
In this web guide, you will learn how to create web socket server using node.js and javascript in windows. Before starting, you must install Node.js on your windows operating system because with node.js you cannot able to run server. If you do not know how to install node.js on windows then visit this link here. Websocket very much popular among developer these days. Websocket allows you to communicate using computers. It just needs a server and clients for communicating with each other. It is widely used in huge applications like Blockchain etc for connecting clients to block chain nodes. In this tutorial we will learn about web socket server.
Steps to Create Web Socket Server
- Create a folder in any location of your choice and then name it with testserver.
- Inside that folder create a file with name index.js or any name of your choice but be sure it has extension .js.

- Open index.js file in any editor you want then add below code in index.js file
/*Express Library*/
var app = require('express')();

/*Http Library*/
var http = require('http').Server(app);

/*Socket.io Library*/
var io = require('socket.io')(http);

app.get('/', function(req, res){
  res.sendFile(__dirname + '/index.html');
});


io.on('connection', function(socket){
   console.log("Server is running");
});

http.listen(3001, function(){
  console.log('listening on *:3001');
});
Installing Libraries
In above code you can see variables app, http and io. These variables defines 3 libraries express, http and socket.io.
Installing Express using Node.js
Open folder you created in step 1 above and then press Shift + Right Click mouse and click open command window here

Now type command
npm install express

Hit Enter some process will start as shown below

Installing http using Node.js Windows
After installing express do not close that window then type command below
npm install http
Hit Enter then wait process completion

Installing Socket.io using Node.js Windows
After installing http using Node.js then type command
npm install socket.io
Press enter and then wait for process completion
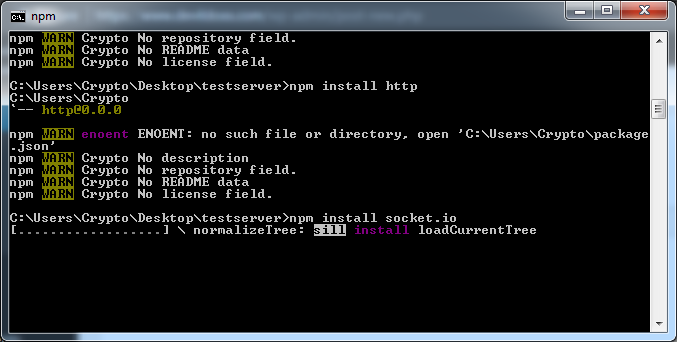
Wait for the above process to finish and then restart your operating system. If you see any warnings as shown above then ignore these warnings.
Running Web Socket Server using Node.js and Javascript
After completing installation of all libraries using Node.js then open same folder again. Same Press Shift and Right Click then open command window here. After opening command prompt window type below command and then hit enter to run Websocker server as shown below
node index.js
Press Enter to execute then it will show message as below
When you see message “Listening on 3001” that means server is running on port 3001. You can change it to any port in index.js file but be sure port you mention is free to use. For checking web socket server is running or not, open your browser then visit link http://localhost:3001 and hit enter. You will see a blank page because we do not add any content in index.html file.

You can add more pages in your server by using below code and then create files related to it as shown below
app.get('/', function(req, res){
  res.sendFile(__dirname + '/index.html');
});
//Second Page
app.get('/page2', function(req, res){
  res.sendFile(__dirname + '/page2.html');
});
//Third Page
app.get('/page3', function(req, res){
  res.sendFile(__dirname + '/page3.html');
});
When you visit link http://localhost:3001/page2 then page2.html will be called. Similarly when you visit link http://localhost:3001/page3 then page3.html will be called.
Uses of Web Socket Server
Web socket is used for creating interface where users directly connect to server for communications. It is widely used for chat applications because you can send messages to all clients connected to your server. It is better then creating chat applications with Mysql and PHP. Block chain also uses web sockets for connecting their nodes to clients.
If you still face any problem regarding installation and running Web Socket Server then comment down below.


